27 April 2013

Service Shoe Type II


Service Shoe, Type II
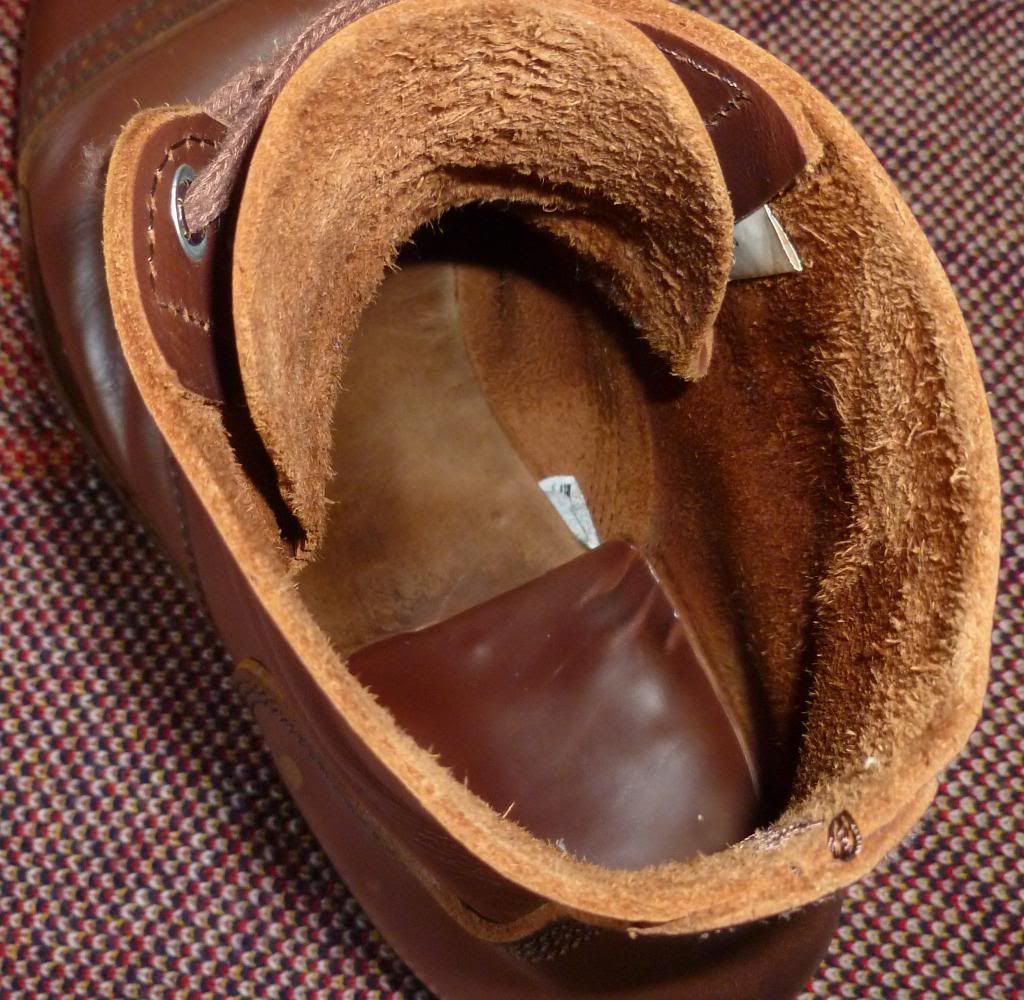
Size tag visible on inside of boot

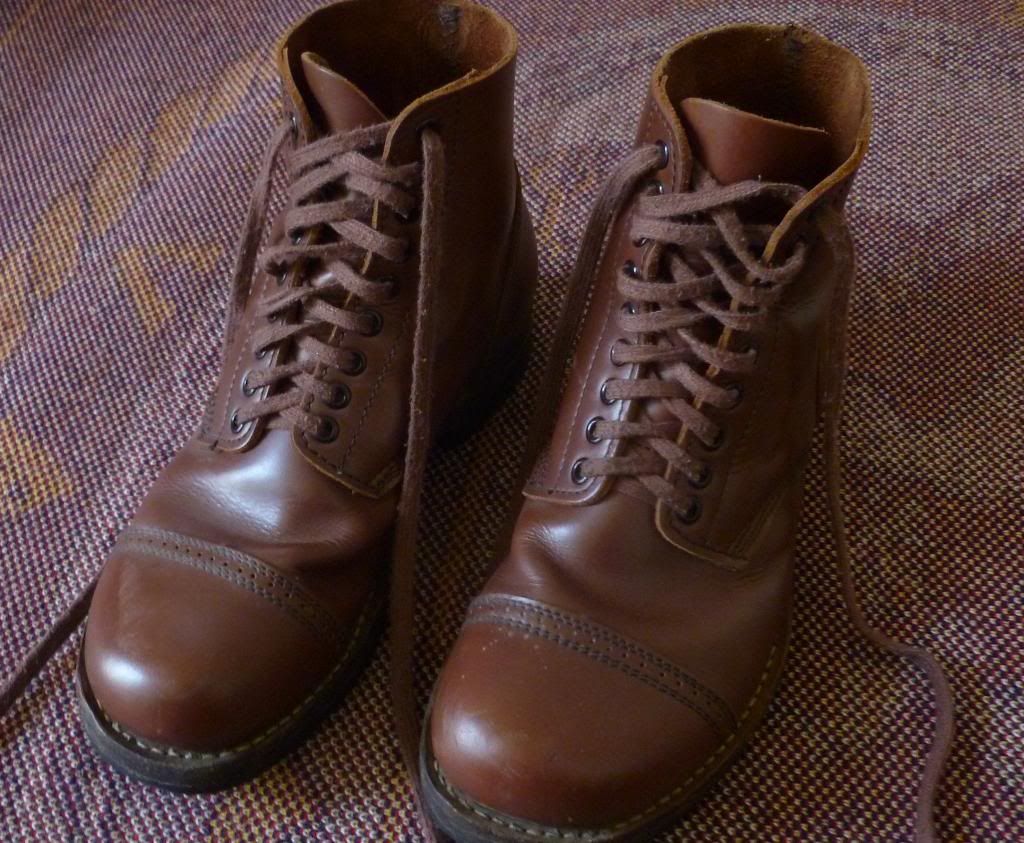
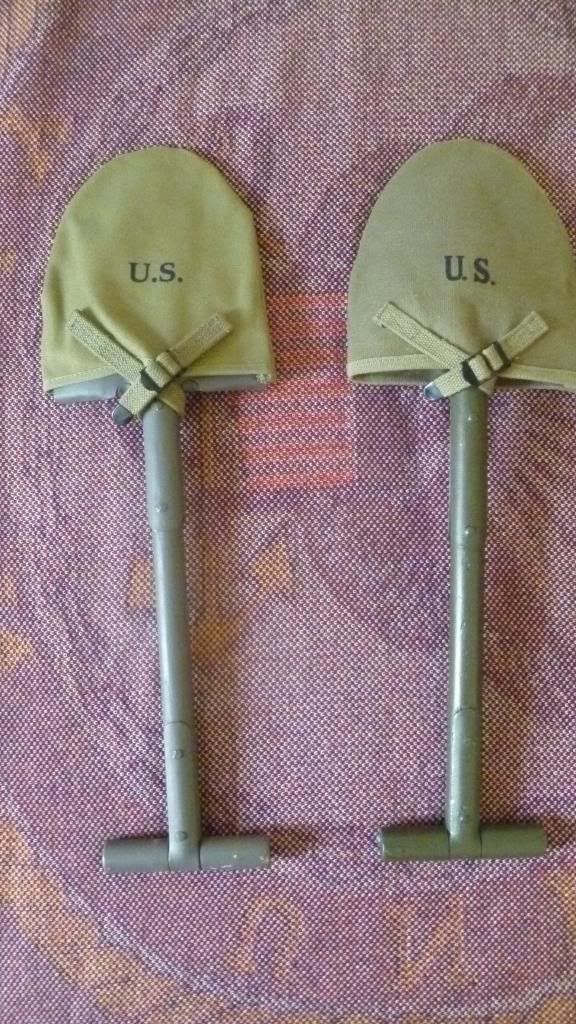
Although it has been repeated ad-naseum, the phrase "an army marches on it's stomach," is true, no matter what conflict is being discussed. However, I'd argue that an army's footwear is pretty damn important too. Enter the Service Shoe, Type II. Intended to supplement the Type I, this product took the form of a low-quarter boot, with finished leather facing out.
 The more famous "roughout" boots were constructed with unfinished leather facing out, so waterproofing could be easily applied. The Type II saw more use by garrisoned forces, although examples of soldiers wearing this footwear into combat have been well documented. This particular pair of boots is manufactured by At the Front, by a Chinese company. Original footwear is no longer suitable for field use, so this reproduction is the best chance for any re-enactor to obtain a facsimile, at a reasonable cost.

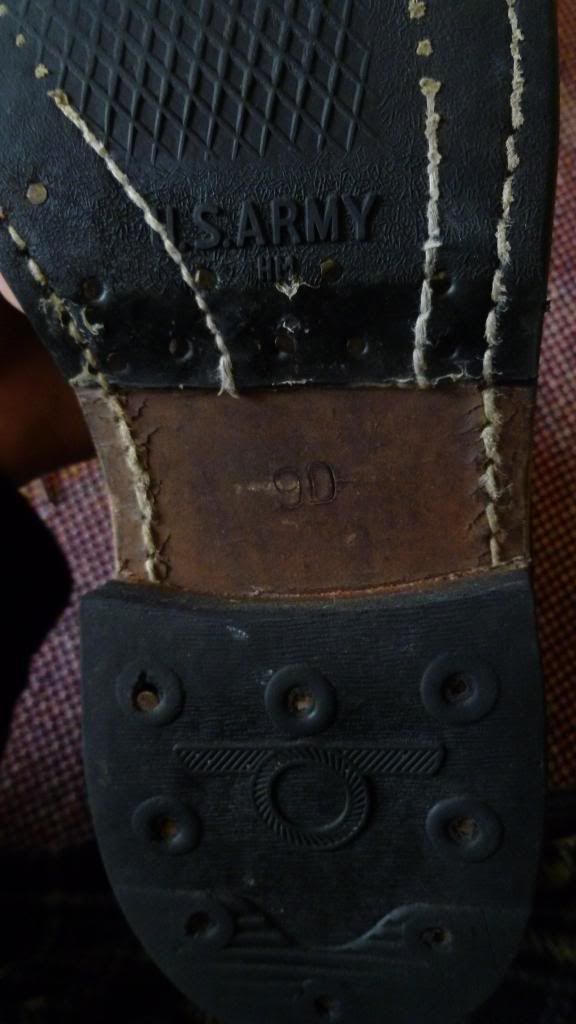
Marked US ARMY on sole.
  I understand that one reproduction company offers an American-made version of the Type II, although I find these to be cost-prohibitive at current. Many stories have detailed that the more expensive boot last longer than the Chinese copy, but I cannot verify these opinions. My ATF boots are a size 9D, marked on the underside of the sole. From the original photographs I have seen, the boots appear to be fairly accurate. The reddish-brown color of the originals has been approximately fairly well on these boots, but do differ to some degree. For the average re-enactor, comfort may be the overriding factor when it comes to a purchase. So how do the ATF copies stack up? I broke the boots in over a period of a month, and noticed that while the boots were comfortable, and lightweight, the soles were hard, lacking any degree of cushioning. Although I may get flak for saying this, the addition of a certain massaging gel insole may be warranted for extended time out in the field. I do enjoy these boots, and occasionally wear them with jeans, as they definitely are eye-catching. 


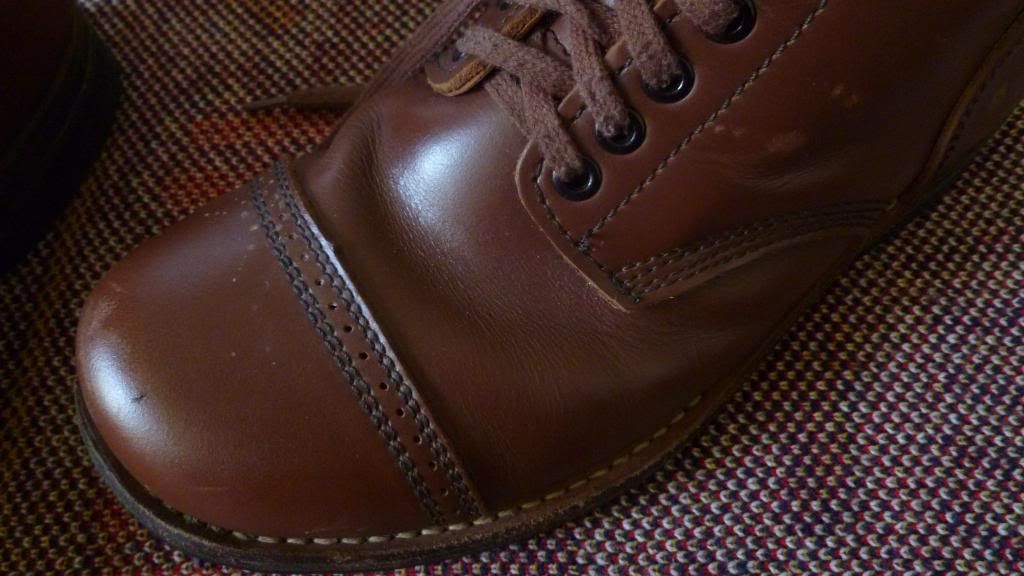
Classic toe cap stitching. Note the attention to detail around the eyelet area.

24 April 2013

M1910 E-tools


 Reproduction M1910 Shovels: A Comparison

With the fast pace of modern mechanized combat, it's easy to forget the simple importance of being able to dig-in to a position. Before technology, there was the M-1910 shovel. The ubiquitous "t-handle" shovel just screams WW2 USGI, but was equally at home on the back of a US doughboy, circa 1917. Take a look at the classic shape. 
Profile of shovels is slightly different.


Just imagine trying to drive the short steel blade into frozen earth, perhaps under fire. Not an easy proposition by any stretch. From personal experience, I can tell you how much of a pain in the ass it is to sit in any seat with a backrest when you have a 36" piece of wood and metal strapped to your haversack. Perhaps this is which the folding shovel was so quickly adopted, once it was ready in 1943. I love abuse, so I love the t-handle shovel.
I currently have two reproduction versions, as I'm not in the habit of testing the mettle of 70+ year old wood on some North Carolina mud. The "SEMS 1942" stamped model seems to be a composed of a thicker metal, with somewhat crude tooling marks. The paint is of a darker green shade, a pretty good representation of OD3. The cover is marked with the fake manufacturer name, and is dated 1942. Due to its more robust build and somewhat inaccurate stamping, this is the shovel that actually gets used in the field. The At the Front example appears to be closer to the original in form. There appears to be two wooden shims driven into the base of the shovel head, a feature I have seen on several real models.
Note wooden shims on ATF model. Metal is somewhat thicker on the SEMS 1942 model.

The stamping is also more correct, with a simple "US"  on both the metal and wood of the handle.The cover bears ATF's "Crawford Canvas Company," stamp, and is dated 1942. I like the finish on the ATF cover, although the two reproductions are comparable in quality. The average re-enactor will have the cover hidden underneath the mess tin pouch on their haversack anyway, so the accuracy of the cover itself should not be as important as the quality of the shovel. 

ATF Model includes company stamp.
All told, I don't think you could go wrong with either model. Both have their strengths and weaknesses. If you want to actually dig a foxhole and don't care about how the M-1910 is stamped, go with the SEMS 1942 model. If you're a stickler for detail, check out the At The Front model, available "Summer 2013."
 

23 April 2013

RWS 34


2010 RWS Diana 34. Wood looks pretty nice after 3 coats of Tom's 1/3 Wax.
RWS Diana 34  
As an avid informal target shooter from the great state of New Jersey, my options to explore this pursuit are, let's say, pretty limited. It was only my time outside of NJ due to college that allowed me the opportunity to really expand on my interest- and purchase my first air rifle. The decision did not come lightly, and I spent a great deal (read: too much) time reviewing the various options out there. My budget, ~$300, helped narrow the field. because I wanted a pure plinker with some limited hunting capability thrown in, I decided fairly early on to pursue the .177 caliber. Pyramyd Air, one of the leading names in the air gun industry, has stated that .177 pellets fly with a generally flatter pattern, which makes hitting glass bottles and other random targets much easier at distances approaching 100 yards. 

Always cool to be able to say "German air rifle."
To that end, I also decided on the purchase of a scope, to easily put accurate groups on paper, beyond the range of iron sights. With this criteria out of the way, I still had many great rifles that fit the bill. It seemed that the typical offering, ie. Crosman and Gamo, were of robust construction, but various reviews steered me away from these manufacturers when I read reviews expressing some quality control issues. Eventually, one air rifle began to separate from the pack. RWS' flagship model, the Diana 34, seemed to have nothing but positive reviews across the board.


The 3-9x Leapers scope includes an optional sunshade.
 Available at Pyraymd Air for $219.99, free shipping, the model seemed ideal for my needs. (The price has now risen to $279.99!) Fortunately for me, RWS seems to have recently addressed a common problem with their rifles- that of "barrel droop." While quite a weird name for an issue, it refers to the tendency of RWS rifles to group high when combined with a standard scope and mount combination. This sometimes occurs to such a degree that the rifle still groups high, even with the scope's elevation adjustment bottomed out. Leapers has worked with RWS to produce the a "droop-compensating scope mount," which essentially provides a dovetail rail adjusted to a 33.7 degree slant, designed to counteract the effects of barrel droop on RWS rifles. 

Using a Leapers 3-9x40 scope with medium-profile rings, I can safely report that this mount performs flawlessly. I have been able to achieve quarter sized groups from 35 yards away, and regularly destroy cans and bottles at a distance of 150 yards-sometimes more! The Diana 34 is an excellent, economical, and fun plinking weapon. With a tin of 500 .177 pellets running approximately $8, one shoots for far cheaper than any .22 rimfire.
Close-up of the droop scope rail and adjustable objective. Note the safety at the rear of the receiver.

Some miscellaneous notes. 

 This Diana 34 was purchased right before RWS switched the configuration of the model. My older 34 contains the T-05 trigger, which features second-stage adjustment, but offers no first-stage adjustment.
Nice view of the Monte Carlo stock and the (gasp) plastic trigger.
Some will also complain that the T-05 features a plastic trigger blade. The new T-06 model features both adjustable first, and second stage travel- the blade is now metal. While the T-06 doubtlessly offers finer control of the trigger, the updated model dispenses with features that are more desirable- in my mind. While the T-05 used a traditional hooded post front sight constructed of metal, the new model uses an updated fiber-optic site, made of plastic. While the fiber-optic offers faster target acquisition and better low-light performance, users have reported that it is somewhat more prone to breakage under field conditions. Another change from the T-05 to T-06 model is the deletion of the Monte-Carlo style stock for a straight profile stock.

I personally enjoy the cheekweld offered by the T-05's Monte Carlo stock, and view the T-06's straight stock as a compromise to keep the costs low. One significant bonus to the T-06 model is the rubberized buttplate- the T-05 model has no buttplate, with the end of the stock prone to wear marks over the course of normal service life. 

Links:
More Pictures 
T-05 Trigger Debate
Detailed RWS 34 Review
 

Hello Alice


This is my ALICE pack as configured for a 1-week backpacking trip. It's pretty much bursting at the seams with survival gear, and it would take weeks to get through all the stuff inside. So that's what I intend to do. Most of my kit is readily available on Amazon or through eBay, and decisions were made from a costs standpoint. The ability to have a fully functional, rugged survival pack is what brought me to the ALICE system in the first place.

Keen observers will note that this is not a traditional ALICE setup. It has been finished as an incomplete "Hellcat" style backpack. It's an easy process to mod the pack, and can be accomplished for under $100. Essentially, one adapts MOLLE style shoulder straps and kidney belt to the older frame, attaching a Sleeping-System carrier to finish the process. I've decided to go with a simpler sleeping pad and canvas cover, which will be discussed later. For now, check out these links to get started on your own Hellcat.

Hellcat Modification Instructions (with pictures)
ALICE pack with frame (ebay)-$46 shipped
MOLLE kidney belt (Amazon)-$22 shipped
MOLLE Shoulder Straps (Amazon)- $37 shipped
Sleep System Carrier (ebay)- $24 shipped


WW2 Canteen Comparison


Mil-Tec Canteen versus WWII USGI Model

Sturm Reproduction canteen set pictured left, 1943 dated canteen cover on the right.

 The Sturm/Miltec reproduction canteen is a stab at a piece of field gear that no-one thought needed to be done. For years decades, the standard USGI steel or aluminum canteens have been widely available, and therefore, cheap to buy. From early WW2 canteen sets with covers, to the more rare USMC models, to the doubly rare black porcelain examples, there is a wide variety of covers, canteens, and cups to the average collector. 

Overall shape is pretty close. Note difference in shade.

I have a fairly standard USGI set, with a 1943 dated cover, 1944 canteen, and 1944 cup. As with many canteen covers, it has shrunk slightly with age, so it has become more difficult to remove the cup from the cover. The interior lining has developed a slight tear, which I understand is fairly common among older covers. 

For this reason, perhaps, Sturm has decided to corner the market on a product never before attempted: a reproduction WW2 USGI canteen. The company has produced a valiant attempt at re-creating the classic lines of the GI product. 
The GI cup is a bit larger, and has a more 'graceful' curve.

Unfortunately, there are too many differences between the real steel and the reproduction to really recommend its purchase. The shape and scale of the canteen is somewhat different, as can be seen in these comparison photos. The reproduction cup, which is not marked, is not able to be used with the authentic issue, or vice versa. Furthermore, the total capacity of the reproduction is 28 ounces- 4 ounces shy of the USGI issue canteen. The cover has a nice attempt at the liner of the real WW2 issue, in fact looks quite similar. The shape is pretty close, although the Sturm model has too much material for the smaller sized canteen.
Too tight a squeeze for the issued canteen. Sturm cup is too small.

 The fit around the reproduction canteen is somewhat loose, but understandably is a great fit around the larger, real model. My takeaway: ditch the reproduction canteen and cup, use the new cover to hold a USGI example. You won't risk damaging an aging example of a cover, and you'll look quite spiffy with the new model. If you're interested in the cover alone, there are several other retailers offering their take. As far as I know, Sturm is the only one producing the metal canteen and cup, however flawed it may be. 

I've taken a bunch of other pictures for your viewing pleasure. You can not the various differences between their shape and structure, but pay special attention to the cup's handle, canteen cap shape, and liner material.